RPG Maker MV
2023-06-16
Backstory
Recently, I started working on a short game in RPG Maker MV. My reasoning behind this is split several ways - for one, I’ve always enjoyed 2D top-down RPG games as a consequence of the first video game I played being Pokemon Blue. Subsequent years led me to play Pokemon Yellow, then Pokemon Crystal, then Pokemon Emerald many years later - see the pattern? I didn’t play another series of games until I picked up Megaman Battle Network 3 for some reason that I have no memory of, having never seen nor played any other Megaman game. Other reasons include recently watching a great playthrough of the original Baldur’s Gate and other CRPGs by Lyle Shnub in the background while doing other tasks - a great influence for ideas and getting into the atmosphere of older fantasy games with a heavy emphasis on numbers and strategy for combat and incredibly in-depth storytelling. The actual tipping point for settling on RPG Maker MV and not other engines that I have already had significant experience in was the request of an associate of mine that I’ve discussed game development with in the past asking about tile movement permissions. As I’m definitely not actively working on 6 different personal projects already, my response of course was to buy RPG Maker MV on Steam and start production on an entire game in it, as opposed to:
- Unity with my two (!) unfinished projects.
- or engines with a brighter future that have recently caught my eye (e.g. Godot).
- or the other primarily 2D engine that I’ve pinned to my bookmarks bar for close to a decade now (Love2D - I never got around to properly learning Lua 😅).
Reasonable, right?
First, answer:
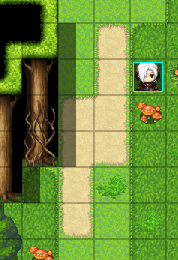
Making these sand tiles impassable in this example:
 Click the database button:
 Click on the tilesets tab, then find the tile that you want to modify in the list of tilesets.
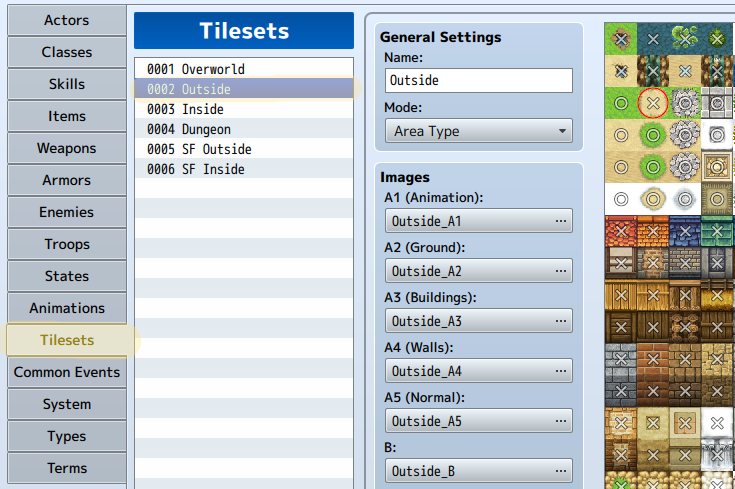 On the far right, click on the tile to cycle between “passable” (indicated by a circle) and “not passable” (indicated by the ×). Click apply, then OK.
End result:
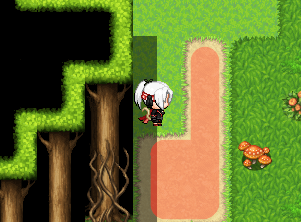
The tiles we changed, highlighted red for clarity - the engine normally doesn’t display a color overlay for these attributes of tiles, can no longer be passed by the player character. These permissions also apply to some other checks, such as randomly moving NPCs (in my experience - I haven’t done extensive testing or reading into this yet). Scripted NPCs movement, however, will ignore this - useful for something like shoving a ghost through an otherwise impassable wall, which is part of the introduction cutscene in my game.
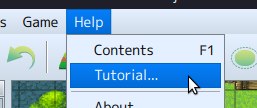
Built-in Tutorial
RPG Maker MV has a neat tutorial system included, under the “Help” menu option - sadly, this doesn’t appear to work under Linux when I last tried (under *buntu 23.04 kernel 6.2).
Works fine under Windows, however, and as everything else seems to work under Linux so far I’ve just relegated working through the tutorial to a Windows machine for the time being rather than trying to work out a fix for something that I’ll only go through once. As I’m working through the tutorial, I’ve been syncing it to a git repo, as I intend to also do while actually working on the development of this project. The nature of the file structure and underlying core of the RPG Maker MV engine makes this quite easy - it’s primarily JavaScript.
Git
Git is a means of “version control” - i.e. it tracks changes to files over time and maintains a history of them. Having the ability to rollback to a previous version of a build is incredibly useful for diagnosing issues that crop up as a result of some errant change made during development that could otherwise slow down the entire process by having to manually comb through the source files to find where the problem lies. Personally, the ability to easily compare current files to those of a previous version is what I rely on the most. Additionally, if I reached the point where I needed to work on this project with more than one person, git is arguably the standard way of handling multiple developers on a modern project. It’s also incredibly useful as means of backing up a project, as well - even in the event Github (or Gitlab or any self-hosted git server you might use) dies or kills your project for any given reason, every device that you’ve worked on the project using git essentially has a backup - up-to-date as of the last time you ran git fetch on it.
For the following bit of walkthrough, I’ll assume the use of a Github private repository - accessible only by those given explicitly given permission. Public repos can also be made, but I use a private repo for my project since it has art and music assets that I paid for even though the end result will likely never see an actual release.
First, make a Github account. Next we’ll set up SSH keys for ease of use - if you’re doing this on Windows, get WSL. Not much work needs to be done here - the instructions boil down opening a command prompt with administrative privileges and typing wsl --install. Type wsl.exe afterwards to open what is essentially a virtualized Linux distribution - by default, Windows installs Ubuntu. It can also be accessed from the start menu after you’ve completed the initial installation. By default, you’ll have no .ssh keys installed - let’s generate them:
ssh-keygen -t rsa -b 4096 -C "[email protected]"
On the prompt asking where to save the key, press enter to accept the default under /home/username/.ssh/id_rsa. Set a passphrase, or don’t, depending on how much you care about security. If you opt for one, follow this so you’re not entering passphrase every time you use it. Or don’t, because you’re really only using the SSH key when you “push” or “pull” your code to/from the remote repository, which should happen infrequently enough during a single session of working on your project. Up to how much time and effort you want to invest into this system, especially if you’re new to it. Git can be a bit much to grasp if you’re just jumping into the deep end, but once you’ve used it for a while you’ll really appreciate how much it helps development, especially in a longer project.
Back to the walkthrough - with those keys generated, next we have to add them to our account to authorize their usage. Github has a tutorial here - it boils down to running cat ~/.ssh/id_rsa.pub and copying the results of the command to the “Key” box on this page.
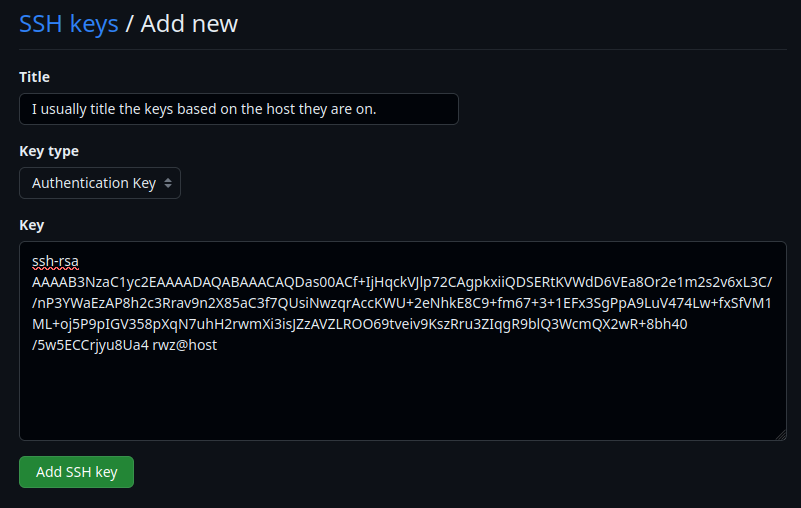
After adding that SSH key to your account, preferably set your primary email address to private if it isn’t by default and copy the address Github provides you from this section of the settings menu; it should be in the form of [email protected].
Set your git config up using the following commands:
git config --global user.name YOUR_GITHUB_USERNAME
git config --global user.email [email protected]
For your first repository, use the web interface - it’s mostly self-explanatory from there. We’ll follow the commands given, first starting in our RPG Maker project folder:
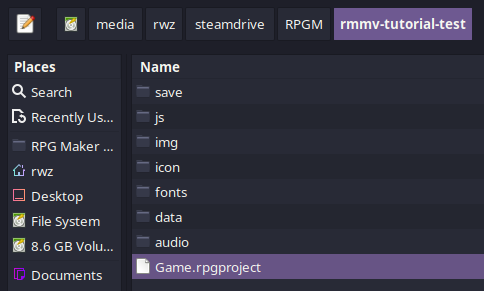
Mine is located at /media/rwz/steamdrive/RPGM/rmmv-tutorial-test/, so first I’ll cd (change directory) to that location:
cd /media/rwz/steamdrive/RPGM/rmmv-tutorial-test/
I named my Github repo test since it’s only for the purpose of this walkthrough, so the URL given in the commands will be [email protected]:VS-W/test.git for me.
We’ll do
git init
to initialize the repository in our local folder.
We’ll skip adding a “readme” file for now, and instead just add all of the project files using
git add .
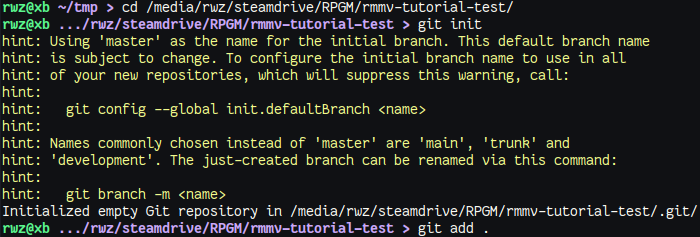
then create our first “commit” to the repository:
git commit -m "initial commit"

Ordinarily, you’d be more descriptive with what changes you made to with the commit, but in this case it’s just the initial files we started with.
Next we indicate which branch we’re working on, main in this case as the generally accepted primary branch name at the time of writing.
git branch -M main
So far, we’ve only worked with all our local filesystem - next we’ll actually set our remote origin:
git remote add origin [email protected]:VS-W/test.git
Don’t forget to replace that URL with your own.
Finally, we’ll actually “push” that “commit” to our repo:
git push -u origin main
With that, you’re essentially done.

As you make changes to your project, you’ll follow the same pattern:
git add .
or
git add <filename>
if you’re only modifying a single file. Multiple files can be added using one command, separated by spaces. Since most of the modifications are handled through the RPG Maker GUI, you’ll mostly be running git add ., followed by
git commit -m "what changes I made are written here, in brief"
git push
If you want to pick up working on another device or host, run
git clone [email protected]:VS-W/test.git
Replacing the URL with your own, of course. That command should copy the remote git repo to your local machine, which you can then open in RPG Maker MV and continue working. Remember to
git add .
git commit -m "message"
git push
whenever you’ve completed changes you’d like to record. If you’re picking up the work on a device you’ve already cloned the repo to, before you start making changes you’ll want to run
git pull
to get your local repo up to speed with the remote repo.
As changes are made, you can see the differences in files between commits - e.g., running.
git log
will provide a list of commits made to the repository, while adding the -p flag, e.g.
git log -p
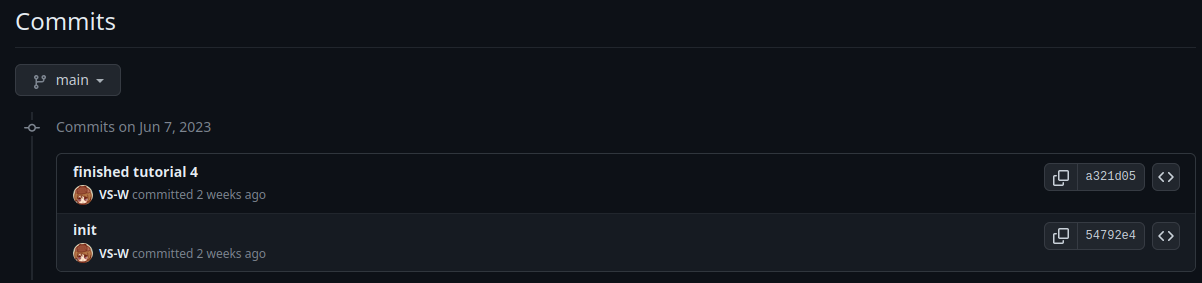
shows the commits as well as the lines changed. Showing the difference between two specific commits can be done by specifying their individual IDs:
git diff a321d05d72378e60ceae34d35f72b2f2ca72a86e 54792e4a757099759307157fb00764d3ad8a8ffe
There is a number of GUI options for working with git, but I prefer to keep to the CLI where possible; if you are otherwise inclined, take a look through Github’s easily accessible tools via the web interface:
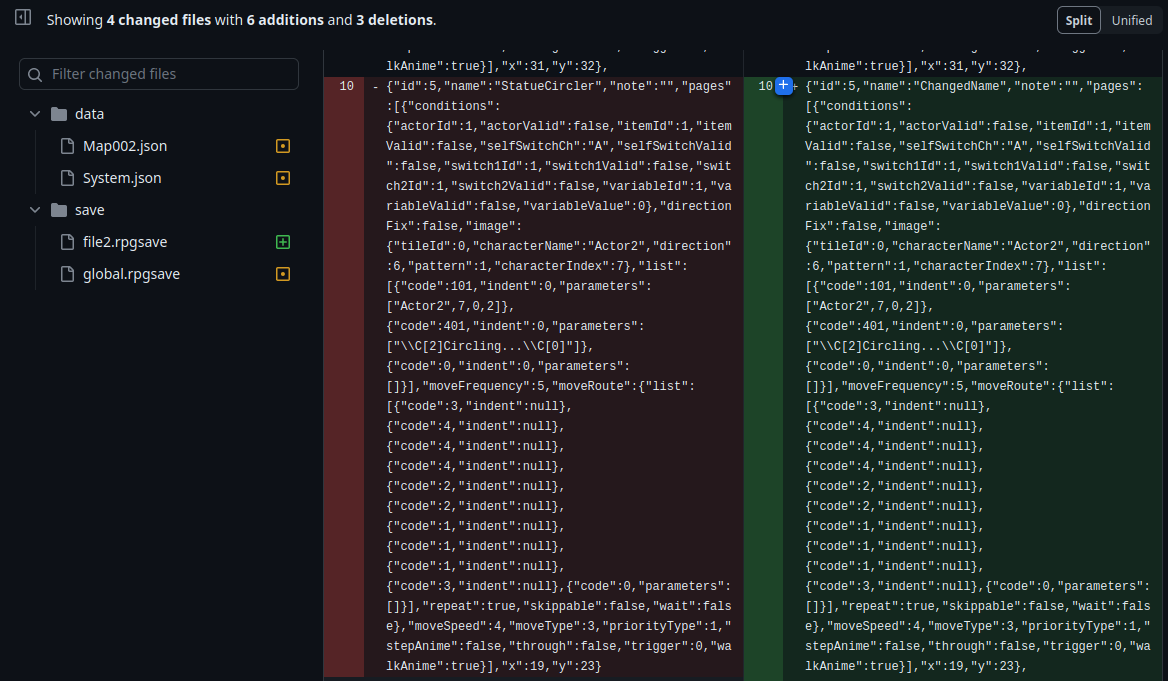
Only significant drawback that I’ve come across is that RPG Maker MV dumps everything into JSON strings, so it’s best to use a diff tool that identifies changes within a line rather than just which lines were changed, e.g. delta:

Conflicts
One of the issues you’ll run into if you’re working with a team, or working on the same project from multiple hosts and forget to pull down the latest changes before you start modifying files, you’ll run the following:
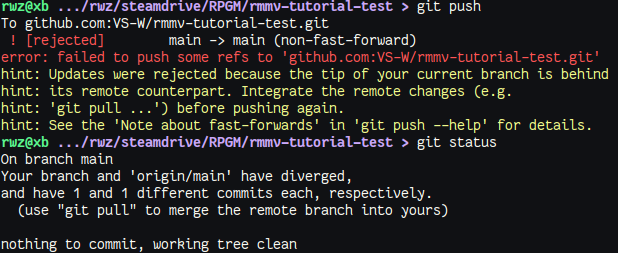
If you try to git pull:
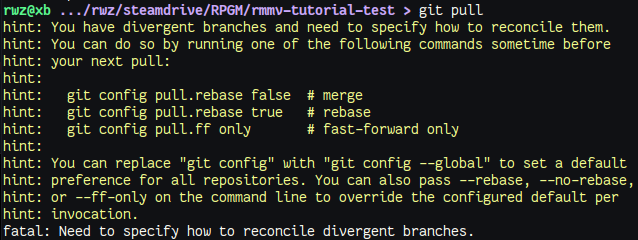
This is where “merging” files comes in - in this case, run:
git merge

You should now go into the files specified in the command and modify it to retain only one of the lines indicated by the markers:
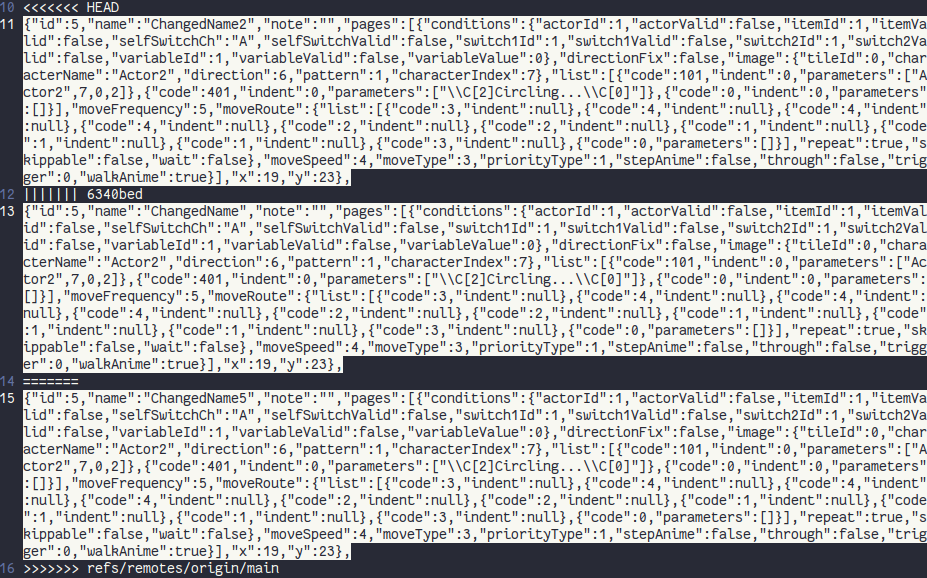
The line following <<<<<<< HEAD indicates the line you modified. The line following ||||||| 6340bed indicates what the line looked like before your change in the copy of the repository that you have locally - the string following the pipes is a hash used to identify that previous commit. The line following ======= is what the remote repository currently has written to it.
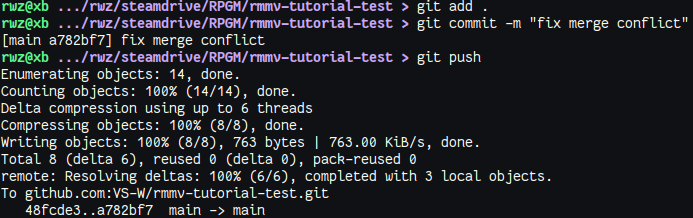
In a situation regarding multiple developers contributing to the same codebase, you’d likely have to work out what the intended line is supposed to look like, referring to any reasoning provided for why a change was made. After completing the adjustments and removing the indicators for the conflicting lines, create a new commit and you should now be able to continue with the merge:

Now, on to actually finishing the tutorial…